Stop Buying New Rose Bushes: How to Grow Roses From Cuttings in a Glass of Water
Stop Buying New Rose Bushes: How to Grow Roses From Cuttings in a Glass of Water
Roses are among the most beautiful and recognizable flowers in the world. Their colorful blooms, delicate petals, and distinctive fragrance make them a favorite for gardens, balconies, and outdoor spaces.
But buying new rose bushes every season can become expensive, especially if you enjoy growing several different varieties.
Fortunately, there’s another way to expand your collection.
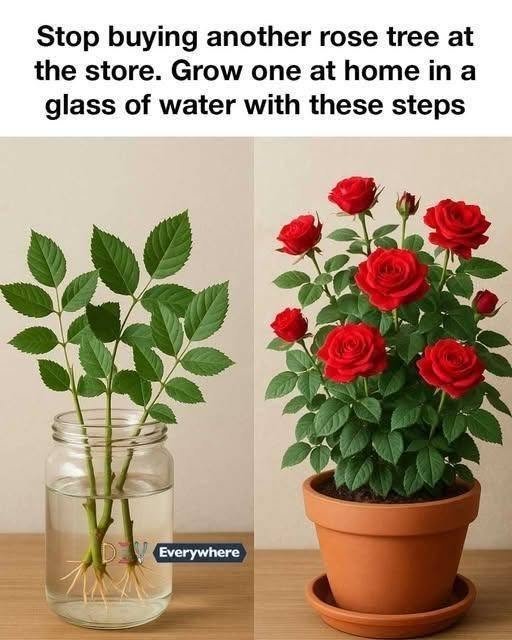
Instead of purchasing another plant, you can try propagating roses from stem cuttings taken from an existing healthy rose bush.
One popular gardening method involves placing a prepared cutting in a glass of water and waiting for roots to develop.
Although growing roses in water is possible with some varieties, success isn’t guaranteed, and rooting directly in a suitable growing medium is often more reliable.
With patience, proper preparation, and a little gardening knowledge, you can explore this rewarding technique at home.
Can You Really Grow a Rose Bush in a Glass of Water?
Yes, some rose cuttings can produce roots when their stems are placed in water.
This process is called propagation by stem cuttings.
Instead of growing a new rose plant from seeds, you encourage a portion of an existing plant to develop its own root system.
If rooting succeeds and the cutting survives transplantation, it can eventually grow into an independent rose bush.
However, not every rose variety responds equally well.
Some roses root relatively easily, while others are more difficult to propagate.
The age and condition of the stem, temperature, light, and growing environment can all influence the outcome.
Water-rooted cuttings may also experience transplant shock when transferred into soil.
For this reason, gardeners often prefer rooting roses directly in a moist, well-draining propagation medium.
Why Grow Roses From Cuttings?
Growing roses from cuttings offers several advantages.
Save Money
If you already have a healthy rose bush, propagation may allow you to grow additional plants without buying new ones.
Preserve a Favorite Variety
Stem cuttings can produce plants genetically similar to the parent plant.
This is useful when you want to preserve a rose with a particular color, fragrance, or growth habit.
Learn a New Gardening Skill
Propagation is an enjoyable way to understand how plants grow.
Watching a cutting develop roots can be especially rewarding.
Share Plants With Friends
Once a new rose bush becomes established, it can make a thoughtful gift for another gardening enthusiast.
Before propagating, check whether the variety is protected by a plant patent or other applicable propagation restrictions.
What You’ll Need
You don’t need expensive equipment to experiment with water propagation.
Materials
- One healthy rose stem from a suitable, non-protected variety
- Clean, sharp pruning shears
- A transparent glass or small jar
- Clean room-temperature water
- A clean cloth
- A small flowerpot with drainage holes
- Well-draining potting mix
- Perlite, optional
Choose a healthy parent plant that shows no obvious signs of disease or serious pest damage.
Fresh cuttings generally have a better chance of survival than stems that have already spent several days drying out.
How to Grow a Rose Cutting in Water
Step 1: Choose a Healthy Rose Stem
Look for a healthy stem that has recently finished flowering.
A semi-mature stem is often a useful choice.
Avoid extremely soft new growth and old, heavily woody stems.
Choose a cutting approximately 6–8 inches (15–20 cm) long.
The stem should have several nodes, which are the small areas where leaves or buds emerge.
Nodes are important because they contain tissues associated with new growth.
Step 2: Make a Clean Cut
Use clean pruning shears to cut the stem just below a node.
A clean cut reduces unnecessary tissue damage.
Remove any flower or developing flower bud.
This allows the cutting to direct more of its limited resources toward survival and potential root formation.
Step 3: Remove the Lower Leaves
Carefully remove leaves from the lower part of the stem.
Leave one or two small sets of leaves near the top if they are healthy.
Too many leaves can increase water loss.
However, removing every leaf may reduce the cutting’s ability to produce energy through photosynthesis.
The goal is to maintain a manageable balance.
Step 4: Prepare the Glass
Wash the glass thoroughly and rinse it well.
Fill it with enough clean water to cover the lower portion of the stem.
Avoid using a container with residues from cleaning chemicals.
Place the cutting inside with the lower node submerged.
Make sure the remaining leaves stay above the waterline.
Step 5: Choose the Right Location
Place the glass in a bright location with indirect sunlight.
Avoid intense afternoon sun, which may overheat the water and stress the cutting.
A warm indoor location with relatively stable temperatures is preferable.
Keep the container away from heating vents and cold drafts.